Practical electronics becomes much easier once you stop thinking in terms of “building gadgets” and start thinking in terms of a few repeatable skills: identifying parts, making reliable joints, reading simple diagrams, and checking your work before power is applied. This guide is for beginners who want a clean starting point without jumping straight into advanced troubleshooting or expensive bench equipment.
Start with the core bench tools
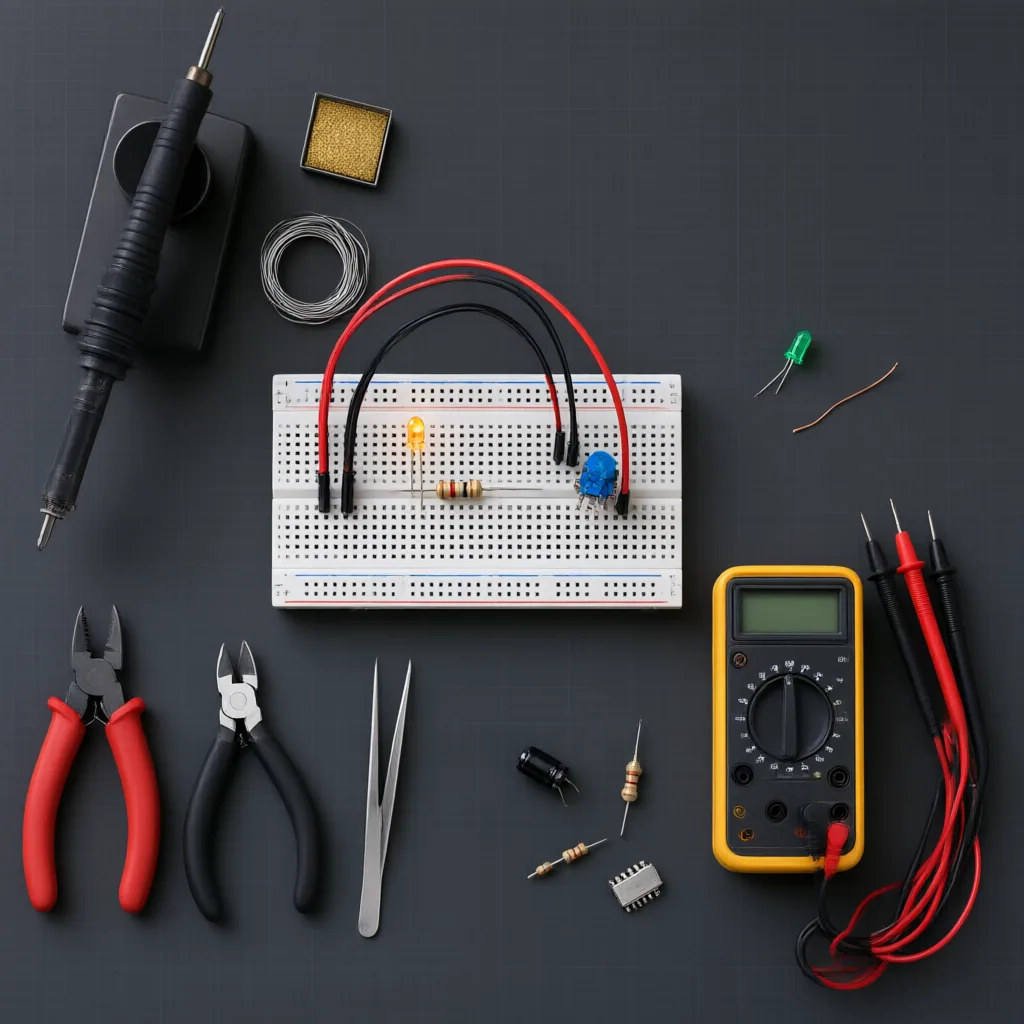
A beginner setup does not need to be large, but it does need to be dependable. A temperature-controlled soldering iron, lead-free or leaded solder suited to your local practice, flush cutters, small pliers, tweezers, a multimeter, and good lighting cover most first projects. Add a stand, tip cleaner, and ventilation plan early. Soldering fumes, hot tools, and sharp component leads are routine workshop realities, not side notes.
Breadboards are useful for learning because they let you test circuits without committing to solder. Perfboard or stripboard is the next step when you want a project to stay assembled. Printed circuit boards are more precise, but they are less forgiving when you are still learning pad spacing, heat control, and component orientation.
Learn the parts before you heat the iron
Most beginner mistakes happen before solder ever touches the joint. Resistors, capacitors, diodes, transistors, connectors, switches, and integrated circuits each have their own orientation, markings, and handling concerns. A resistor usually works either way around, but a diode does not. Electrolytic capacitors are polarity-sensitive. Some semiconductors are more vulnerable to heat or static discharge than newcomers expect.
Read values carefully, lay components out in groups, and compare what is on the bench with the diagram or parts list. If a project uses power rails, ground, or signal paths, trace them visually before assembly. This habit builds the same kind of discipline used in audio, repair, and lab work: understand the path first, then make the connection.
Build safe soldering habits from day one
A good solder joint is bright, controlled, and mechanically stable. Heat the pad and component lead together, then feed solder into the joint rather than directly onto the iron tip. Use only enough solder to form a solid connection. Too little creates weak joints; too much hides problems and can bridge adjacent pads.
Unplug equipment before working on it. Let components cool before touching or adjusting them. Never assume a board is safe just because it looks small. Even beginner projects deserve caution around power supplies, stored charge, and accidental shorts. If something does not fit naturally, stop and inspect instead of forcing it into place.
Choose projects that teach one new skill at a time
The best first projects are simple and visible: an LED flasher, a continuity tester, a small power distribution board, a basic audio cable tester, or a sensor module on a breadboard. Each one teaches a narrow lesson such as polarity, measurement, solder spacing, or signal checking.
Avoid making your first build a dense repair job or a tiny surface-mount assembly unless you already have steady tool control. Progress is faster when each project adds one challenge rather than five. After a few successful builds, move into stripboard layouts, connector wiring, recapping practice boards, or simple enclosure work.
Check your work before power-up
Inspection is part of the build, not the end of it. Look for solder bridges, cold joints, reversed parts, clipped leads left on the board, and missed connections. Use a multimeter to confirm continuity where you expect it and isolation where you do not. On powered projects, verify the supply voltage and polarity before switching on.
When something fails, resist the urge to reflow every joint immediately. Compare the board against the diagram, follow the circuit section by section, and change one thing at a time. Careful troubleshooting is a beginner skill just as important as soldering itself.
Build confidence through repeatable practice
DIY electronics rewards patience more than speed. A small, tidy workstation, a short checklist, and a habit of testing in stages will take you further than a drawer full of random parts. Start with fundamentals, keep safety visible, and let each finished project teach the next one.